Poetry Animation Production Diary
Xanadu Production
After experimenting with my background outcomes and settling on using Cinema 4D to create my backgrounds, production of ‘Xanadu’ began! I was keen to begin as not only did I have my workflow finalized, but I still had some room for creative freedom. I knew at this stage that although I had a rough storyboard and textual storyboard to draw my reference from, it was unlikely that it would be translated 1 to 1 as some animated elements may be out of my current skill level, or wouldn’t be time effective.
As such, a lot of the features you’ll see in the finished animation were improvised during the animation process, and I’ll talk a bit more about those as I talk you through my process.
As such, a lot of the features you’ll see in the finished animation were improvised during the animation process, and I’ll talk a bit more about those as I talk you through my process.
Creating Backgrounds
With my first background created as part of my experimentation, creating the next 3 in Cinema 4D definitely came with its challenges. To start off with, my experience in Cinema 4D is very restricted to geometry and shape, usually to create buildings or abstract forms. Creating a cavern, a mountainous landscape, or an ocean, would definitely be a challenge, and involved some creative problem solving to get the result I was looking for.
My next scene involved me having to create a mountainous/hilly landscape:
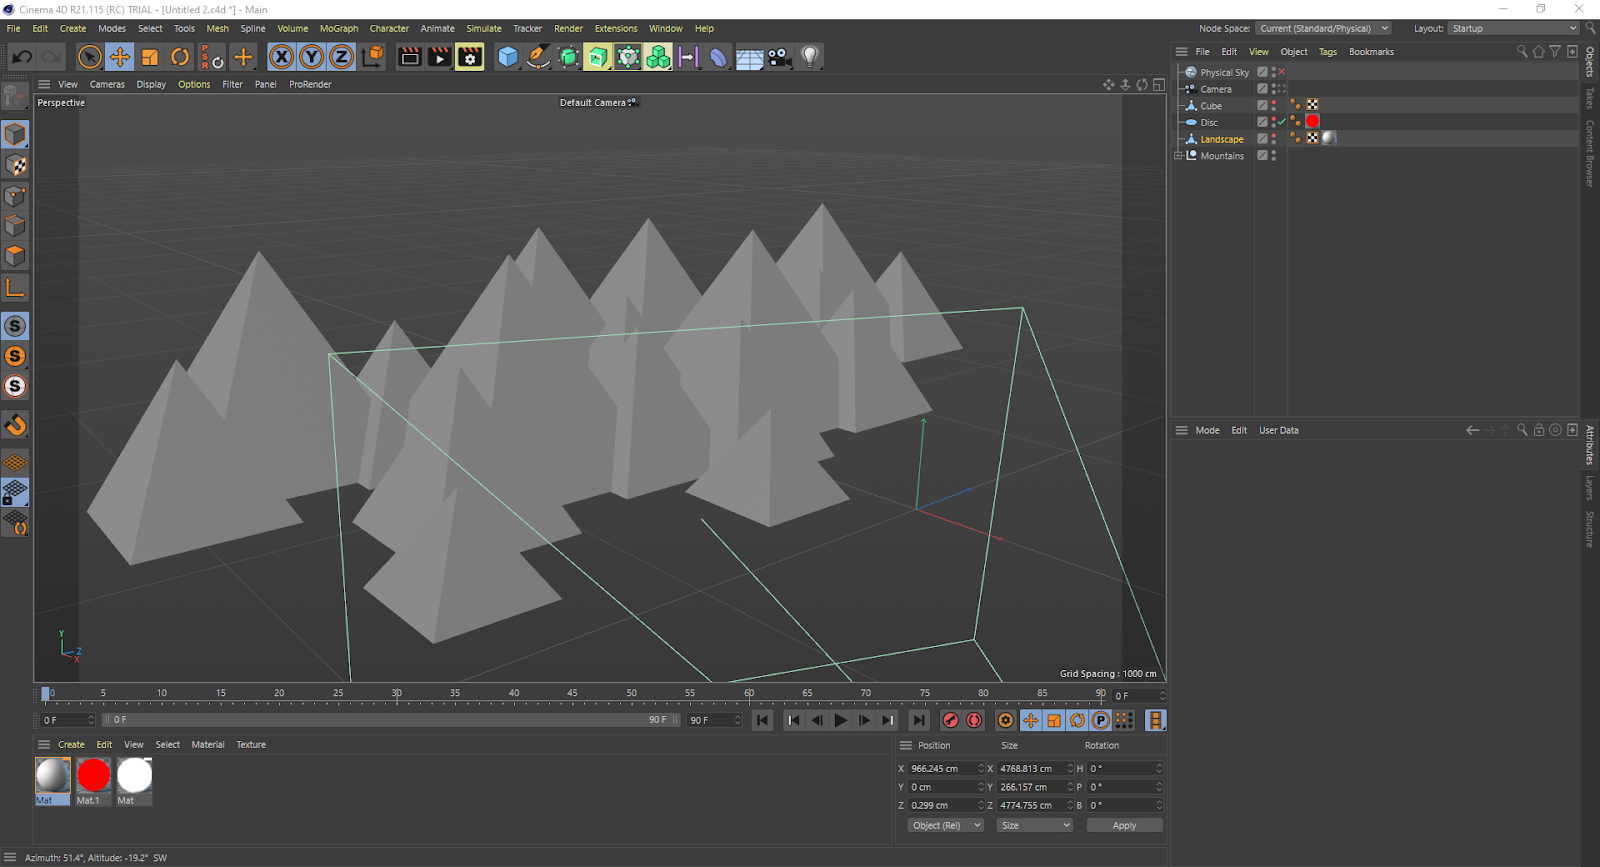
Using the pyramid tool, I created a group of pyramids of varying sizes to create my mountainous region. The upside of using a minimalist/monolith style in this animation meant that no further details had to be added here.

I then added a landscape and added a bump to it using the magnet tool (and selecting anchor points). Only one part of the whole landscape has been edited here, and that’s because that’s all that would be seen by the camera. When creating these scenes, I had to think of how it would look from a certain angle rather than as a 3D model, something I’ve not done in Cinema 4D before. This meant that a lot of elements of the model could be ignored as they’d never been seen in the finished render.
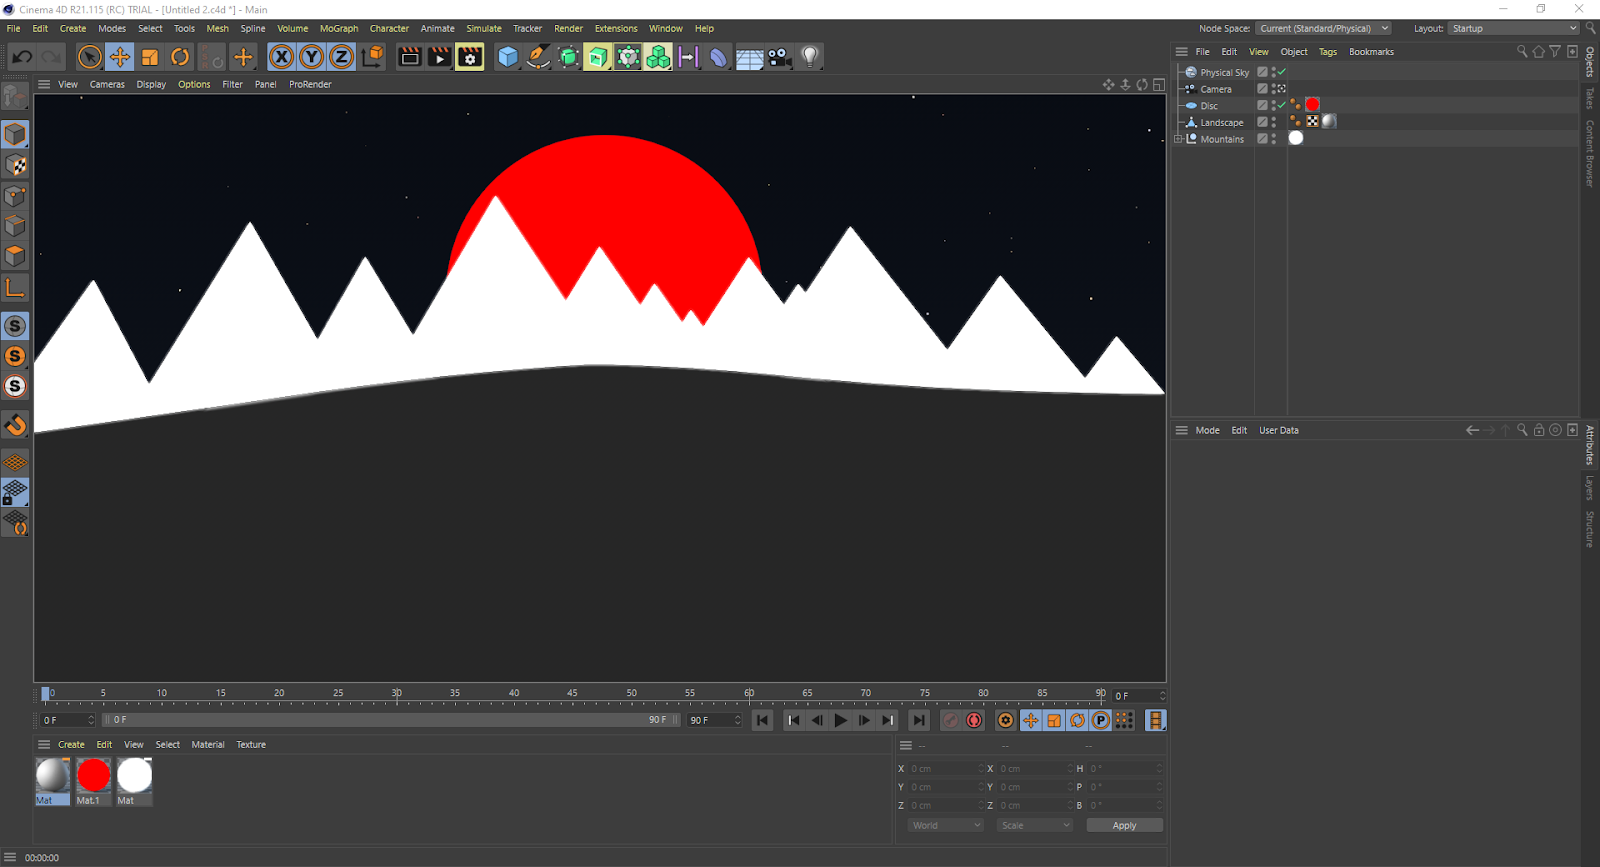
A large disc was then placed behind the mountains, and a camera was set up just behind the bump seen in the previous image. All that was left to do was add materials and a skybox. I used a pure white material with luminescence applied to it for the mountains, red with luminescence for the sun, and the foreground was kept at the stock grey. The skybox is a physical sky with the time set to midnight. I then used a camera to be able to align the shot more accurately, and then rendered the image out to use as my background.
I tried the idea of incorporating the river itself into this render, but it would’ve looked at odds with the rest of the animated elements I’d use in After Effects. So I left it grey knowing I was going to place my river animation in the lower third.
I tried the idea of incorporating the river itself into this render, but it would’ve looked at odds with the rest of the animated elements I’d use in After Effects. So I left it grey knowing I was going to place my river animation in the lower third.
Scene 3 was a cavern:

This was easily the most complex of all backgrounds to create as it involved a lot of problem solving due how to best show the inside of a cavern in 3D. I knew for compositions’ sake it was looking directly down the cavern into the opening at the end like a gun barrel, with symmetry. I started by making a tube object, increasing the inner radius, and then adding an extended cube object at the bottom to represent where the river would go.
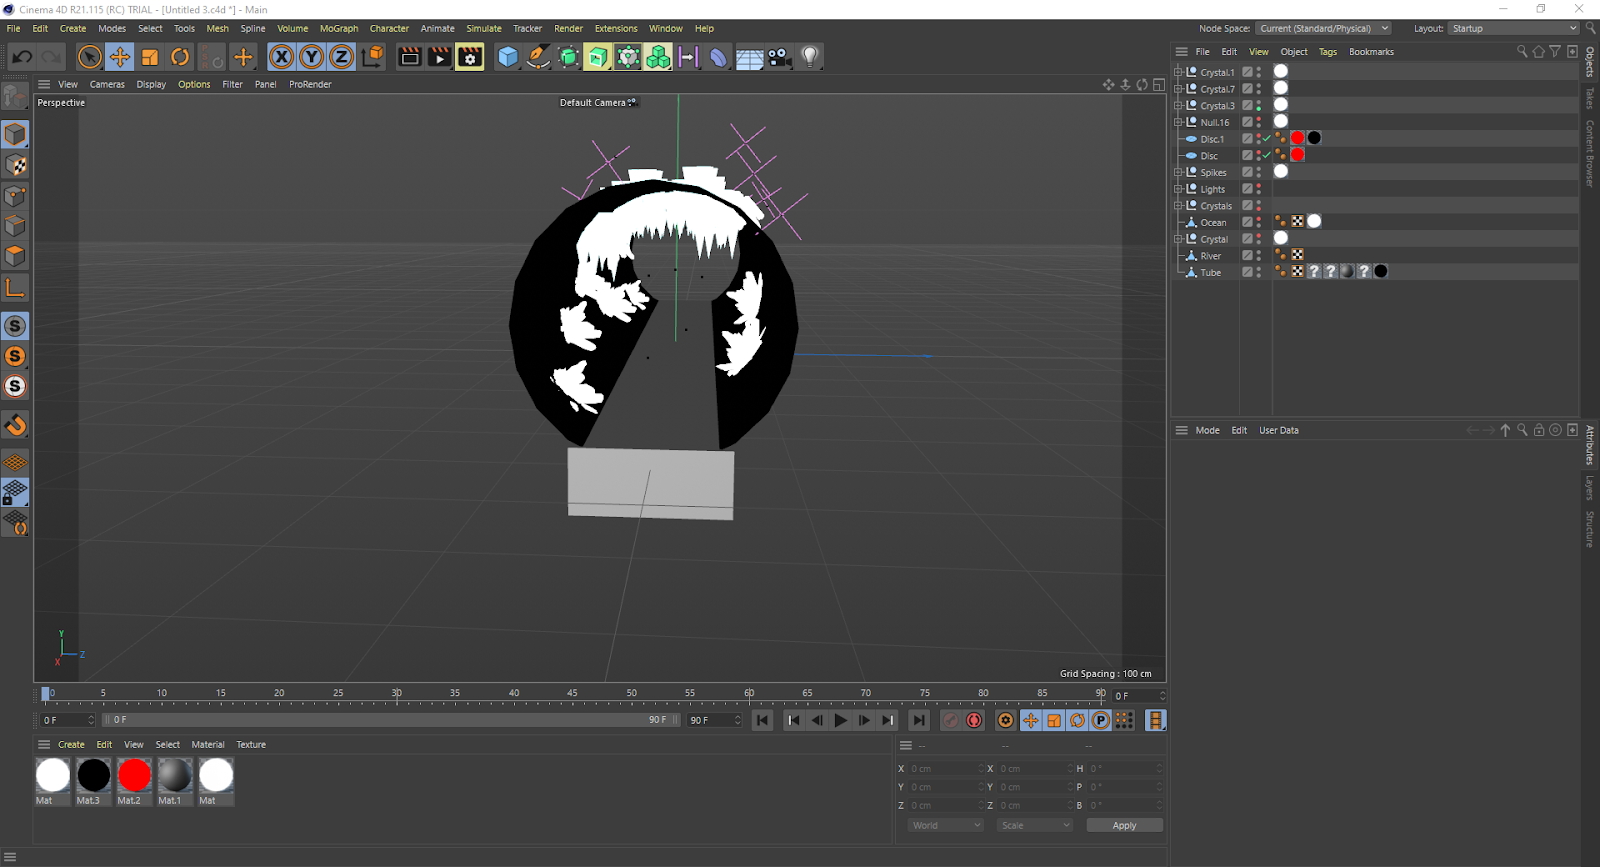
Next I added the crystals seen on the walls as well as the stalactites on the roof of the cave. The stalactites were simple as they were just cone objects which I copied for good coverage and then placed in a null. The crystals were much more complex shapes and I used an online tutorial to create them.

To create the ocean, sun, and black sky at the end of the tunnel, I created a huge flat plane placed parallel with the river, and then placed a red disc at the other side at the same coordinates as the center of my river object. I then surrounded this with another black disc to create the sky behind it.

In terms of materials, I used the same ones as I used in the previous backgrounds for consistency. I then took the render from this angle, and the shot is fairly close to what is seen in my rough storyboard.
For my final scene, I had to remove the Cinema 4D background idea.

This was the attempt at my ocean scene, using a series of stretched half discs to form the waves and clouds, with a large grey plane at the background to form the cloudy sky behind it.
It wasn’t bad when looked at from the angle I wanted, but I couldn’t work out the logistics of how animation would play into this in after effects.
Firstly, I wouldn’t be able to make the waves move, as they’d be static. Secondly, rainfall and lightning would look wrong as they’d be playing in the front of the composition, And finally, I had the idea earlier in the project to have the sun visible in this scene as well, only very faintly, which also wouldn’t have been that easy due to this shot. The waves also tapered off at the sides of the shot which didn’t really make sense.

I then realised that unlike the other shots, there was no real 3D element to this, it was just a matter of layering assets in order to form the composition. As such, I went into After Effects to see if I could create the background there, and it worked just fine:
A dark grey solid in the background, 2 groups of circles of different shades to create the clouds, and 3 rectangles ranging from darker blues to lighter blues (with wave warp applied) to form the waves. Not only does this stay stylistically consistent with the other backgrounds despite being created in After Effects, but solved the problems listed above with my previous Cinema 4D design.
Creating Animated Scenes
With backgrounds completed, it was time to add their animated elements. Each scene, just like creating the backgrounds, came with it’s own challenges which I had to problem solve my way through. One of my favourite things about After Effects is that even though it’s a complex program, it has a lot of room for problem solving and creative solutions, which I hope you’ll some of which here.
Scene 1: Pleasure Dome
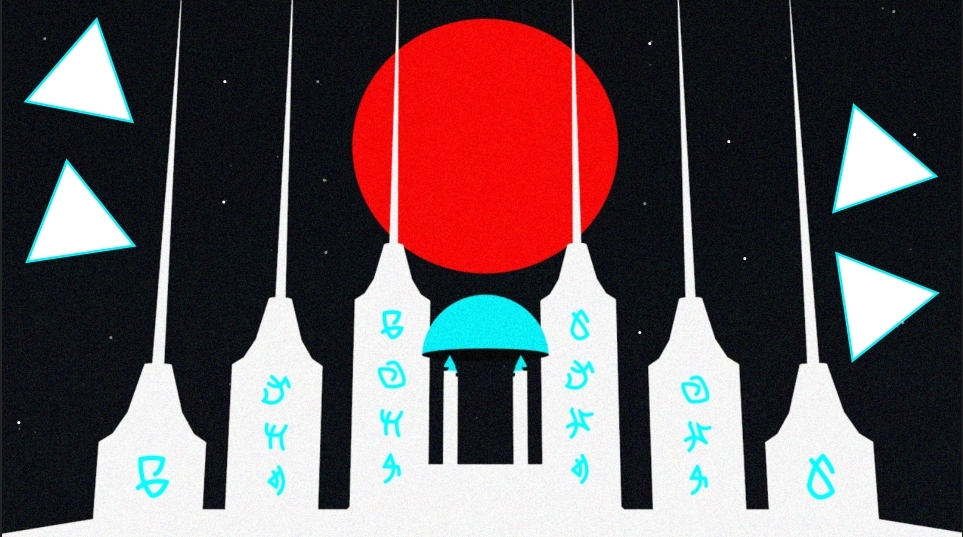
I started by importing my pleasure dome background into my project as footage and resizing the image to fit my canvas. Due to the dome already being part of the geometry in Cinema 4D, I had to improvise some animated elements on the fly befitting of the theme, those being the floating electric triangles in the top left and right, and the glowing ancient lettering on each spire, and the flickering stars in the background.
This is a good point to mention that I wanted the colour blue to represent energy or power in the animation, as well as objects of importance. This is why I’ve applied this colour to the moving or glowing objects in the scene, to suggest that this blue energy is what is powering the technology, as well as being part of the natural world as seen in the oceans, rivers, and mountains. I spoke in my research about wanting to create a world that had a harmonious relationship between nature and technology, which is why I’ve made this choice.
To animate the triangles, I created 4 polygons with a white fill and electric blue border of the same shade as the dome.

I offset their positions to the highest and lowest I wanted them to go on frame 1, and then keyframed their positions to alternate at these heights. I set these frames to ‘easy ease’ to create smoother motion, and then used the loopout() expression to make it loop for the full 6 seconds.
For the lettering, I created the letters themselves in illustrator, separated them into separate layers, imported the illustrator files into After Effects as composition (retain layer sizes), and converted them to shape layers using Motion Tools 2, a plugin.
I placed each of these letters on each of the spires, paying attention to their positioning so they were pixel perfect, and applied the ‘glow’ effect to them.

I then selected the ‘glow radius’ option inside the effects settings, and created a keyframe on frame 1 and set the glow radius to ‘4.0’. I created another at frame 24 and set the radius to ‘50’. This is a relatively short amount of time so it shows the glow pulsating quite quickly. It’s not the perfect effect but it’s the best way to show the effect in the limited window this scene would be on screen.

Finally came the stars. These were relatively simple, they’re very small ellipses which I created 17 of in total. I selected all of the odd numbers of stars, selected the opacity in the shape layer drop down, and set it to 100% on frame 1, 0% on frame 24, and 100% again on frame 48. I then used the loopOut() expression again to have this play for the whole animation. I then selected the even numbers of stars and did this again, but offset the timing to be the inverse, so at frame 1 the opacity was at 0%, at 24 it was 100%, etc. This meant I got a nice faux randomised effect to the blinking of the stars in the background.

Scene 1 complete!
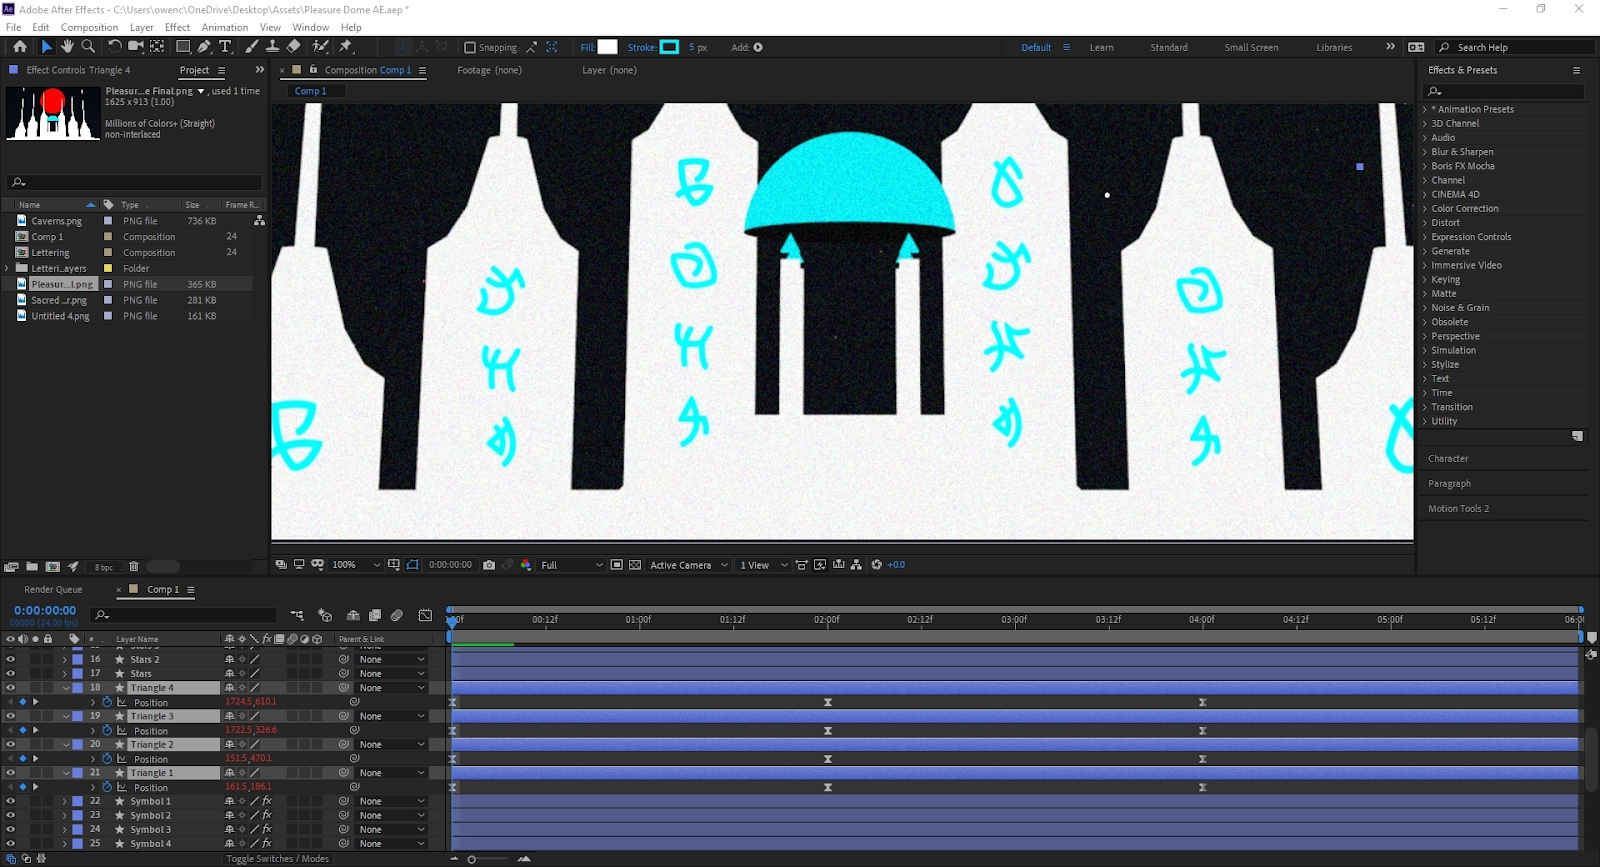
Scene 2: Sacred River
Again, I imported my Cinema 4D background and resized it to fit my canvas. In terms of animated elements, this scene is again split into 3 different animations; the river, the guardian/monolith eyeballs, and the stars. The stars were created using the same method as the previous scene, so I’ll be talking about the guardians and river.
The river was the most complex, so it’s the best place to start. Similarly to how I created the background for my final scene, I used a series of blue rectangles of varying shades layered one after the other. I applied the ‘wave warp’ effect to them, and set the wave type to ‘Sawtooth’. Keyframes aren’t necessary for wave warped elements, they will self animate for the duration of the composition length. I slightly edited the ‘phase’ of each wave warp to ensure each wave wasn’t in sync with one another.

Next were the ‘Guardians’. The Guardians were an improvised idea to add some elements to the middle of the compositions which felt a little empty at the time. The initial idea on the storyboard was to incorporate the pleasure dome again in this scene as if it was zoomed out, looking at the greater landscape it resides in. Due to the method used for creating the background, this wouldn’t really have worked as well, so I felt keeping just the hill there was cleaner.
To create the guardians, it was a simple matter of using the shape tool to create their forms and eyes. To animate the eye movements, I used positional keyframes to animate the eyeball and the pupil independently, to give a more realistic sense of motion. I then offset the movement of the midground guardian (by placing the start positional keyframe at the other side) to make it appear that each one was scanning the environment individually of one another.
Scene 3: Caverns
Scene 3 was relatively simple to animate with the knowledge I had at the time, as methods learned in the motion design school and in creating the previous scenes helped push me along. There were 2 animated elements in this scene, the water flowing out of the cave, and the wobbling, glowing mushrooms aligning the walls.
To create the shape of the water, I had to use Adobe Illustrator. To my knowledge, there was no way of changing the anchor points of a shape to create a new polygon inside of After Effects. So, I opened the background in After Effects, traced the shape of the river using the pen tool, applied a linear gradient from blue to pure white, imported into After Effects, and it fit perfectly. The transition of the water from blue to the pure white of the ocean I’d made in Cinema 4D worked particularly well also.

To animate the water itself, I used the same principle as the river, applying the wave warp effect to a series of rectangles placed along the river, downsizing in scale to match the perspective. I coloured each wave 1 shade darker than the water it sat in to still be visible, but also to produce a multilayered gradient effect along the path of the water.
To create the mushrooms, I used a technique I learned when completing one of the lessons in the Motion Design School. I drew a mushroom in Adobe Illustrator, and imported it into After Effects, duplicating it 6 times and reducing their scale to fit the perspective of the cavern. I then applied the ‘CC Bend It’ effect to each mushroom, which allows you to bend shapes from designated anchor points. I set a +10 value on frame 1, and a -10 value on frame 24, using the loopOut(‘pingpong’) expression to not only have this movement loop for the whole length, but to make the animation bounce back and forward rather than going from right to left only.
Scene 3 complete!
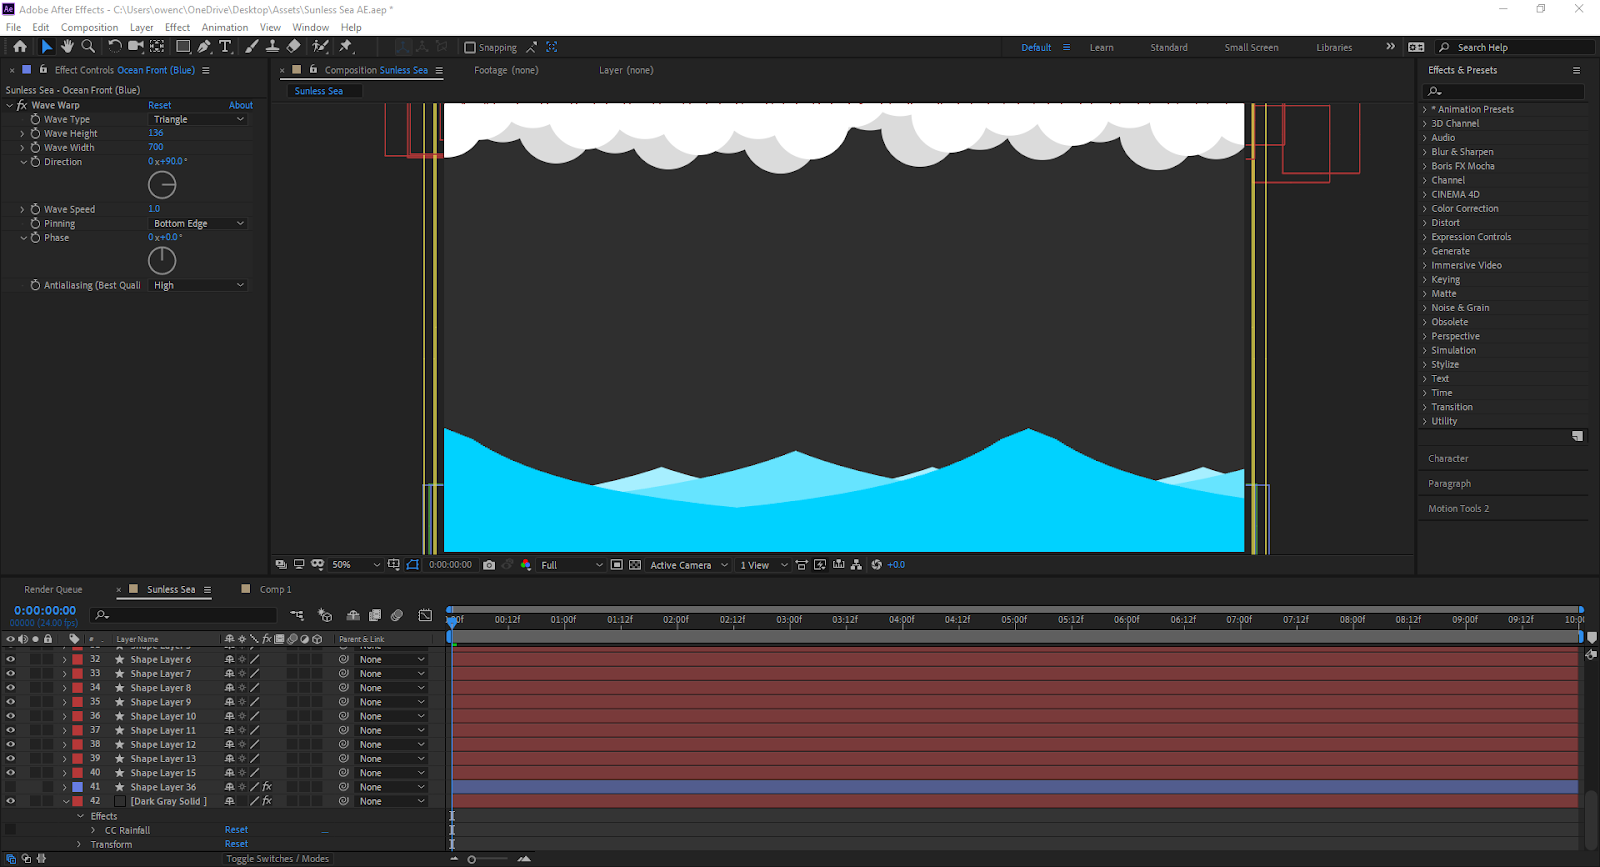
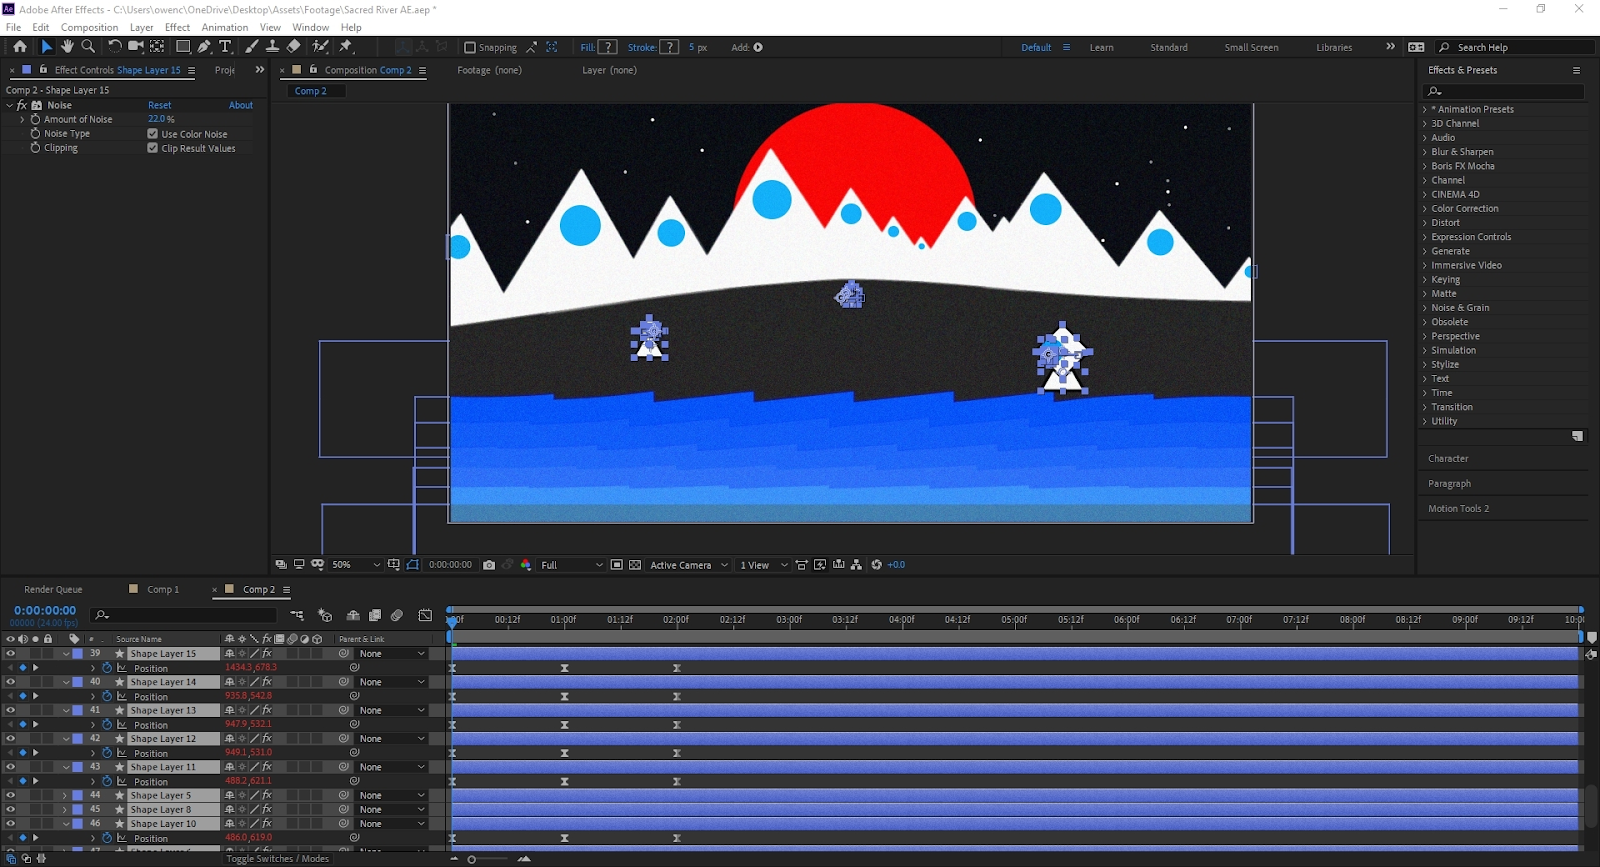
Scene 4: Sunless Sea
As this was the only scene that didn’t have an imported background, I had a bit more freedom to play with multiple effects. The first step was to create the waves, which follow the same principle as I did for the river. I created 3 rectangles, ranging from dark to light blue, applied wave warp to them, set the wave type to ‘Triangle’, and change the ‘phase’ of each wave to be visible during the animation. No keyframing necessary, the animation just plays out.
CC Rainfall was used to create the rain, but it had to be applied to a layer first. I created a ‘solid’ layer, set the colour to a mid grey to mimic a grey sky, and applied CC Rainfall to the solid layer. From here, I altered the settings of CC Rainfall to fit what I wanted to show. Due to the size of the waves and the fact I wanted to use lightning in this shot, the rain had to show how stormy the scene was, so I increased the drops, speed, and wind direction to reflect this. I fought with the idea for a bit, but I did finally add a very blurry low opacity red sun in the back of the shot.
The final element was the lightning. ‘CC vertical lightning’ was used for this. I created 3 transparent rectangles and renamed them to ‘Left Lightning’, ‘Middle Lightning, and ‘Right Lightning’. I then dragged ‘CC vertical lightning’ onto each, and moved the nodes to display where the lightning was emitting from, and where it was going to. I change the core and glow colour of each bolt to be pure white to match the colour palette, and my lightning was in place.
The final part was working out how to make each bolt appear at different times, as well as how to animate it striking the ocean. For this, I used the ‘linear wipe’ effect on each layer. I set the wipe keyframe to 100% for when I wanted the strike to start, and then a keyframe of 0% a few frames later so it appeared quickly. I set the angle to 0, so the wipe was vertical. I repeated the process for the other 2 lightning strikes, changing the linear wipe keyframes to match when I wanted them to appear, at seconds 3:00 and 4:00 respectively.

All scenes complete!
Opening Titles, Transitions, and Closing Titles
My animation also features opening and closing titles, as well as transitions between each scene.
To create my titles, I used the animation feature inside Photoshop. I drew the word ‘Xanadu’ on a dark grey background, and created 3 more layers. Then, selecting each layer one by one, traced over the word until I had 4 layers of the traced word. I then opened the ‘create frame animation’ window, created 4 frames, set each frame to 1 of the layers, and it created a custom made line boil. I then exported this as a GIF to be used in Premiere Pro later on.

This process was repeated for the ‘Written by Samuel Taylor Coleridge’, ‘fin’, and ‘Animated by Owen Connolly’ scenes, with the only exception being fin which had a digitally drawn starry night background.
My animation also features 4 transitions that were also created using After Effects.
Water Splash - To transition from the first to the second scene, a swirling water splash masks the hard cut between the two. To create this, I used an online tutorial, but rather than follow it 1 to 1, took the principles in it and created my own version of the transition. This involved making an ellipse, setting keyframes on a ‘trim path’, keyframing the stroke width, and changing the colour to electric blue.
I then added a ‘repeater’ to this which duplicates this same animation, and changed the scale to fill the canvas, as well as changing the rotation to offset each section of the water rotation (the same as how ‘phase’ changes the positions of waves in wave warp). From here, I added turbulent displacement to make the shapes appear more like liquid with no hard edges.
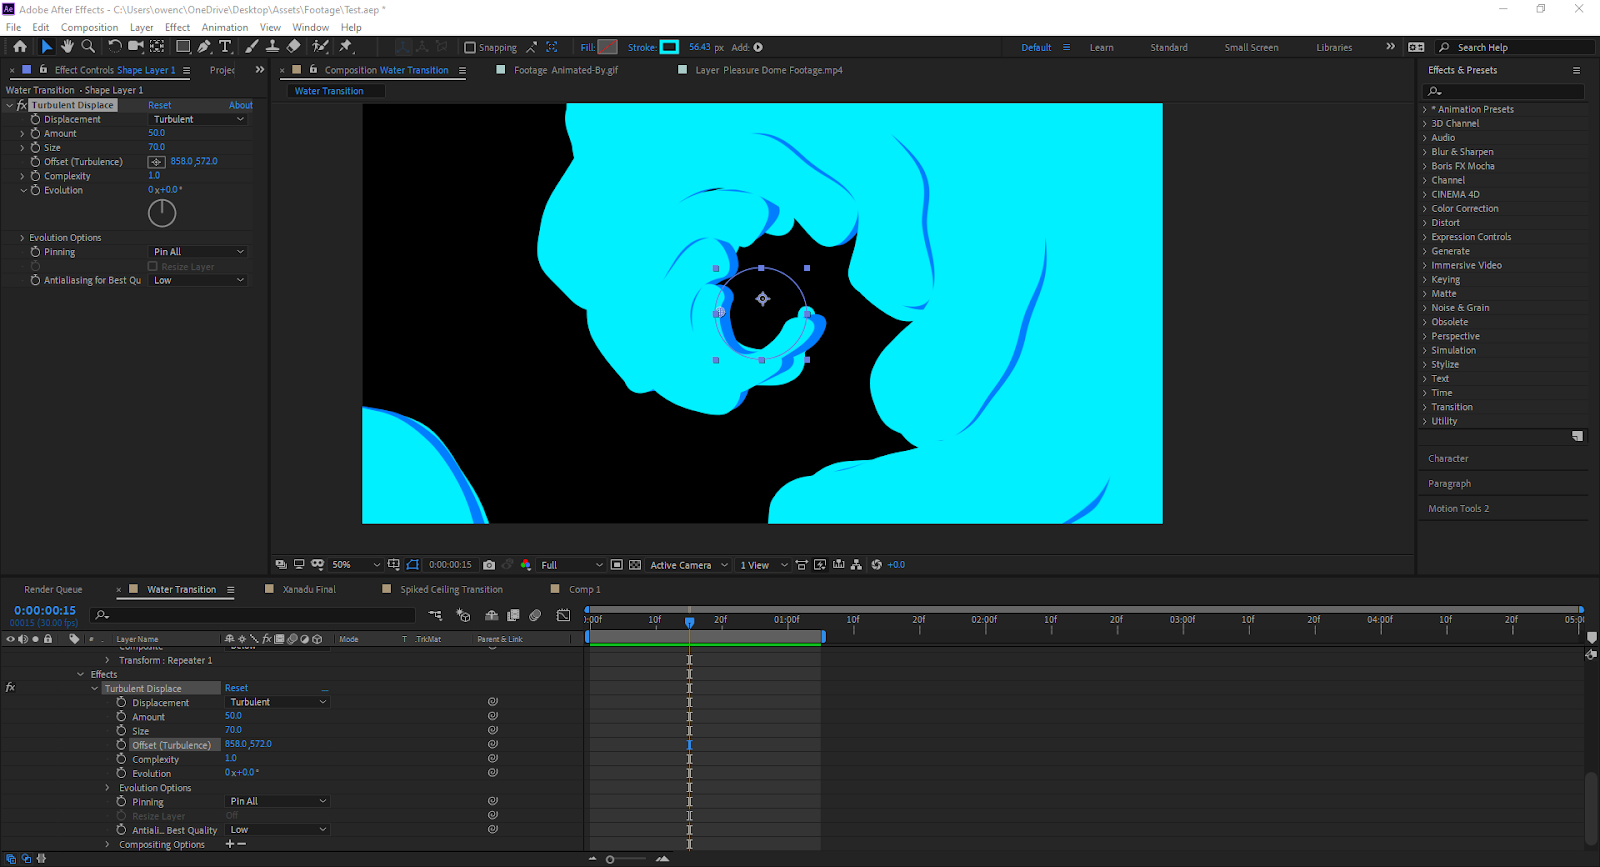
The last thing to do was to duplicate this layer twice, changing the colour of one to add depth to the animation, and turning the 3rd into a ‘matte’. By moving the matte, both colours could then be seen, and when the animation was played back, it was multilayered.
This was more complicated than I thought!
Spike Roof - To transition between the river and cave scene, I made a custom animation. I made a series of spiked columns, consisting of 2 triangles and a rectangle, and placed them end to end to fill the canvas. I then edited the position keyframes from the top of the canvas (out of view) to the bottom (out of view).
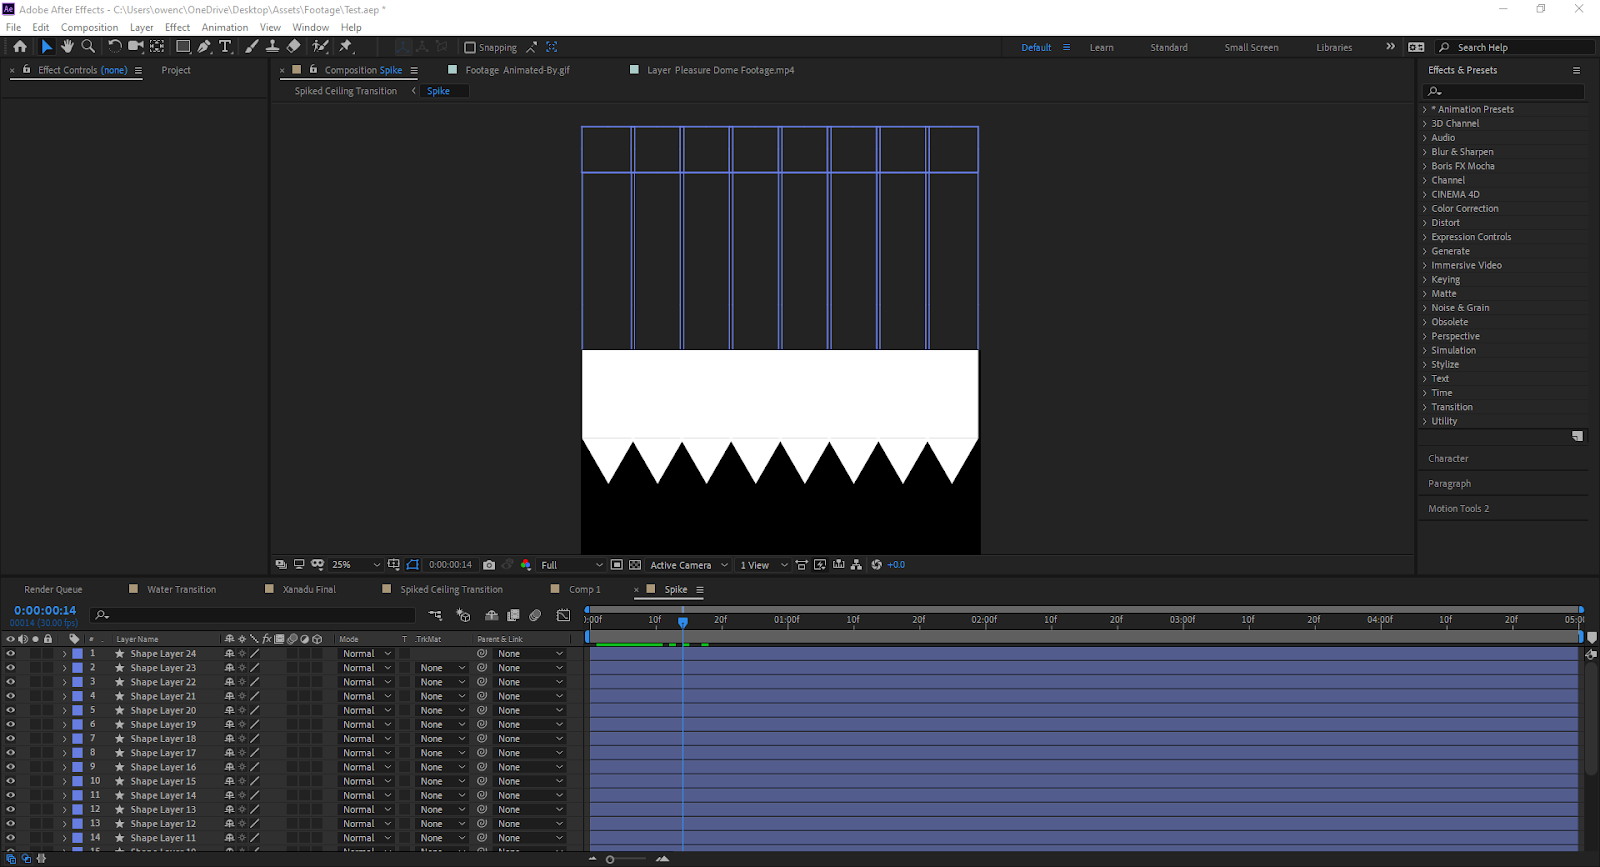
When importing this into my main composition, I simply hit the hard cut between where the columns completely mask the canvas, making the transition seamless.
Pan Up - The final transition was a pan from the ocean scene, into the sky which read ‘fin’. To do this, I created a rectangle the same dimensions of the canvas, and applied a gradient to it, from white (the same colour as the clouds) to dark purple (the same colour as the sky in the ‘fin’ GIF). In my main composition, I moved the footage of the sunless sea scene and the gradient rectangle downwards at the same time, to give the illusion of the scene panning upwards. From here, I set keyframes to change the opacity from 100% down to 0% very quickly to hide the seam, revealing ‘fin’.

Construction - To construct the final visuals, I imported each scene and GIF as footage into a separate After Effects file, and placed them in order. I then took the transitions and placed them to mask each cut. Unfortunately there is no way to extend GIFs in After Effects, so I had to duplicate the GIF for as long as I wanted it to last.
This is the finished timeline -

The very short, stacked clips are the GIFS, the longer ones are the scenes, and the blue and brown clips at the top represent the transitions. Also note that not all of the scene footage is used and trimmed down to size, and this is to match what I felt was appropriate pacing.
Premiere Pro, Narration, and Sound Effects
While the exported MP4 from After Effects would’ve matched my storyboard, I decided to add narration and sound effects to add some more depth to it.
I imported the MP4 into Adobe Premiere Pro, and used downloaded royalty free sounds at different points in the animation. On the opening titles, howling wind can be heard in the background, as I felt this matched the theme of landscapes. A loud ‘gong’ marks the appearance of the pleasure dome relating to the eastern influence on the animation. A low electrical hum runs through the animation as a bed track, to give a sense of electricity and energy running through the landscape. Finally, my own voice is narration reading out the poem, finally marking out each lightning strike on the sea. The sounds were simply downloaded and placed onto the timeline, and the narration was recorded in 4 separate lines in Adobe Audition, trimmed, imported, and placed to match each scene.
The animation is finally complete.
Despite just having under a week to create the animation, I’m extremely thrilled with what I managed to create. The knowledge I’ve gained just through tutorials, experimentation, and problem solving alone has been invaluable, and I look forward to starting new projects armed with the knowhow I now have.

Comments
Post a Comment